iOS8 Core Image In Swift:视频实时滤镜
iOS8 Core Image In Swift:自动改善图像以及内置滤镜的使用
iOS8 Core Image In Swift:更复杂的滤镜
iOS8 Core Image In Swift:人脸检测以及马赛克
iOS8 Core Image In Swift:视频实时滤镜
视频采集
class ViewController: UIViewController , AVCaptureVideoDataOutputSampleBufferDelegate {
var captureSession: AVCaptureSession!
var previewLayer: CALayer!
......
| 除此之外,我还对VC实现了AVCaptureVideoDataOutputSampleBufferDelegate协议,这个会在后面说。 要使用AV框架,必须先引入库:import AVFoundation |
override func viewDidLoad() {
super.viewDidLoad()
previewLayer = CALayer()
previewLayer.bounds = CGRectMake(0, 0, self.view.frame.size.height, self.view.frame.size.width);
previewLayer.position = CGPointMake(self.view.frame.size.width / 2.0, self.view.frame.size.height / 2.0);
previewLayer.setAffineTransform(CGAffineTransformMakeRotation(CGFloat(M_PI / 2.0)));
self.view.layer.insertSublayer(previewLayer, atIndex: 0)
setupCaptureSession()
}
func setupCaptureSession() {
captureSession = AVCaptureSession()
captureSession.beginConfiguration()
captureSession.sessionPreset = AVCaptureSessionPresetLow
let captureDevice = AVCaptureDevice.defaultDeviceWithMediaType(AVMediaTypeVideo)
let deviceInput = AVCaptureDeviceInput.deviceInputWithDevice(captureDevice, error: nil) as AVCaptureDeviceInput
if captureSession.canAddInput(deviceInput) {
captureSession.addInput(deviceInput)
}
let dataOutput = AVCaptureVideoDataOutput()
dataOutput.videoSettings = [kCVPixelBufferPixelFormatTypeKey : kCVPixelFormatType_420YpCbCr8BiPlanarFullRange]
dataOutput.alwaysDiscardsLateVideoFrames = true
if captureSession.canAddOutput(dataOutput) {
captureSession.addOutput(dataOutput)
}
let queue = dispatch_queue_create("VideoQueue", DISPATCH_QUEUE_SERIAL)
dataOutput.setSampleBufferDelegate(self, queue: queue)
captureSession.commitConfiguration()
}
从这个方法开始,就算正式开始了。
- 首先实例化一个AVCaptureSession对象,AVFoundation基于会话的概念,会话(session)被用于控制输入到输出的过程
- beginConfiguration与commitConfiguration总是成对调用,当后者调用的时候,会批量配置session,且是线程安全的,更重要的是,可以在session运行中执行,总是使用这对方法是一个好的习惯
- 然后设置它的采集质量,除了AVCaptureSessionPresetLow以外还有很多其他选项,感兴趣可以自己看看。
- 获取采集设备,默认的摄像设备是后置摄像头。
- 把上一步获取到的设备作为输入设备添加到当前session中,先用canAddInput方法判断一下是个好习惯。
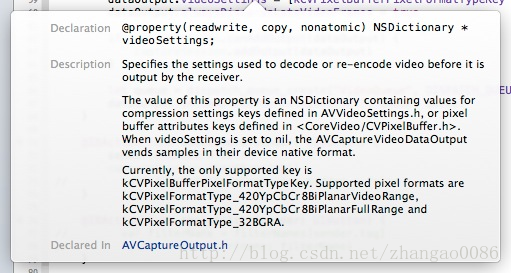
- 添加完输入设备后再添加输出设备到session中,我在这里添加的是AVCaptureVideoDataOutput,表示视频里的每一帧,除此之外,还有AVCaptureMovieFileOutput(完整的视频)、AVCaptureAudioDataOutput(音频)、AVCaptureStillImageOutput(静态图)等。关于videoSettings属性设置,可以先看看文档说明:

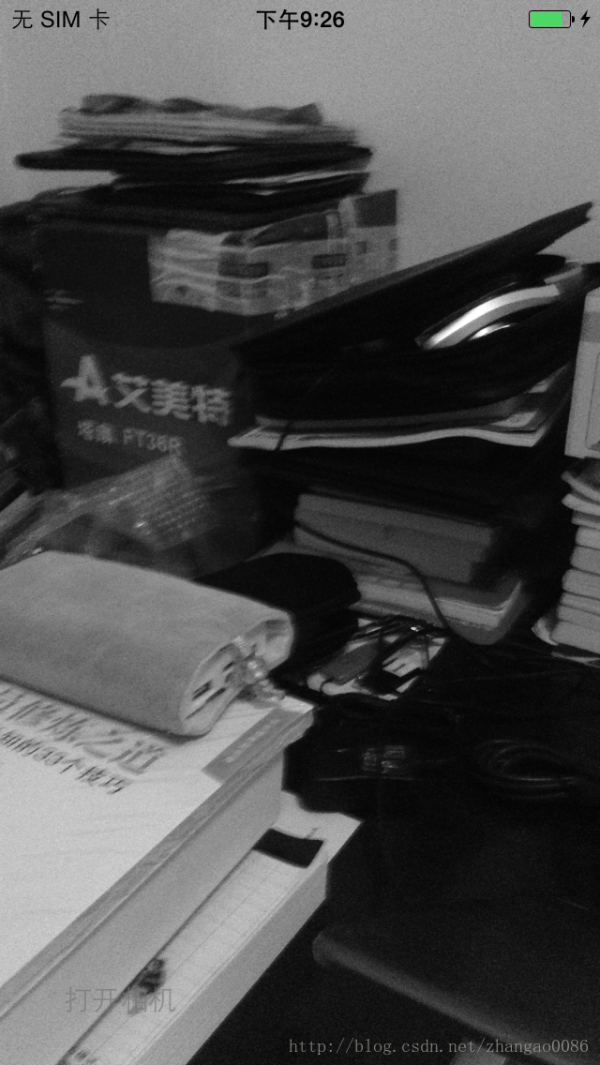
后面有写到虽然videoSettings是指定一个字典,但是目前只支持kCVPixelBufferPixelFormatTypeKey,我们用它指定像素的输出格式,这个参数直接影响到生成图像的成功与否,由于我打算先做一个实时灰度的效果,所以这里使用kCVPixelFormatType_420YpCbCr8BiPlanarFullRange的输出格式,关于这个格式的详细说明,可以看最后面的参数资料3(YUV的维基)。 - 后面设置了alwaysDiscardsLateVideoFrames参数,表示丢弃延迟的帧;同样用canAddInput方法判断并添加到session中。
- 最后设置delegate回调(AVCaptureVideoDataOutputSampleBufferDelegate协议)和回调时所处的GCD队列,并提交修改的配置。
我们现在完成一个session的建立过程,但这个session还没有开始工作,就像我们访问数据库的时候,要先打开数据库---然后建立连接---访问数据---关闭连接---关闭数据库一样,我们在openCamera方法里启动session:
@IBAction func openCamera(sender: UIButton) {
sender.enabled = false
captureSession.startRunning()
}
optional func captureOutput(captureOutput: AVCaptureOutput!, didOutputSampleBuffer sampleBuffer: CMSampleBuffer!, fromConnection connection: AVCaptureConnection!)
这个回调就可以了:
Core Image之前的方式
func captureOutput(captureOutput: AVCaptureOutput!,
didOutputSampleBuffer sampleBuffer: CMSampleBuffer!,
fromConnection connection: AVCaptureConnection!) {
let imageBuffer = CMSampleBufferGetImageBuffer(sampleBuffer)
CVPixelBufferLockBaseAddress(imageBuffer, 0)
let width = CVPixelBufferGetWidthOfPlane(imageBuffer, 0)
let height = CVPixelBufferGetHeightOfPlane(imageBuffer, 0)
let bytesPerRow = CVPixelBufferGetBytesPerRowOfPlane(imageBuffer, 0)
let lumaBuffer = CVPixelBufferGetBaseAddressOfPlane(imageBuffer, 0)
let grayColorSpace = CGColorSpaceCreateDeviceGray()
let context = CGBitmapContextCreate(lumaBuffer, width, height, 8, bytesPerRow, grayColorSpace, CGBitmapInfo.allZeros)
let cgImage = CGBitmapContextCreateImage(context)
dispatch_sync(dispatch_get_main_queue(), {
self.previewLayer.contents = cgImage
})
}
- 首先这个回调给我们了一个CMSampleBufferRef类型的sampleBuffer,这是Core Media对象,我们可以通过CMSampleBufferGetImageBuffer方法把它转成Core Video对象。
- 然后我们把缓冲区的base地址给锁住了,锁住base地址是为了使缓冲区的内存地址变得可访问,否则在后面就取不到必需的数据,显示在layer上就只有黑屏,更详细的原因可以看这里:
http://stackoverflow.com/questions/6468535/cvpixelbufferlockbaseaddress-why-capture-still-image-using-avfoundation - 接下来从缓冲区取图像的信息,包括宽、高、每行的字节数等
- 因为视频的缓冲区是YUV格式的,我们要把它的luma部分提取出来
- 我们为了把缓冲区的图像渲染到layer上,需要用Core Graphics创建一个颜色空间和图形上下文,然后通过创建的颜色空间把缓冲区的图像渲染到上下文中
- cgImage就是从缓冲区创建的Core Graphics图像了(CGImage),最后我们在主线程把它赋值给layer的contents予以显示

用Core Image处理
var filter: CIFilter!
lazy var context: CIContext = {
let eaglContext = EAGLContext(API: EAGLRenderingAPI.OpenGLES2)
let options = [kCIContextWorkingColorSpace : NSNull()]
return CIContext(EAGLContext: eaglContext, options: options)
}()
| 实际上,通过contextWithOptions:创建的GPU的context,虽然渲染是在GPU上执行,但是其输出的image是不能显示的, 只有当其被复制回CPU存储器上时,才会被转成一个可被显示的image类型,比如UIImage。 |
kCVPixelFormatType_420YpCbCr8BiPlanarFullRange
替换为
kCVPixelFormatType_32BGRA
再把session的回调进行一些修改,变成我们熟悉的方式,就像这样:
func captureOutput(captureOutput: AVCaptureOutput!,
didOutputSampleBuffer sampleBuffer: CMSampleBuffer!,
fromConnection connection: AVCaptureConnection!) {
let imageBuffer = CMSampleBufferGetImageBuffer(sampleBuffer)
// CVPixelBufferLockBaseAddress(imageBuffer, 0)
// let width = CVPixelBufferGetWidthOfPlane(imageBuffer, 0)
// let height = CVPixelBufferGetHeightOfPlane(imageBuffer, 0)
// let bytesPerRow = CVPixelBufferGetBytesPerRowOfPlane(imageBuffer, 0)
下一篇 cdq分治